Wednesday, December 19, 2012

ZINA(RAPE) KI SAZAA


↓ ↓ MAS'ALA: ↓ ↓
'Zina' (adultery) karne wale ko 100 kodey maare jaye, riwayat mehy k Hz.Ali ne use jala dia,Hz.abubakar ne unpar diwar gira di
<Anwarul hadis p-297>
»»»►Nabi karim Sallahu Alaihi WaSallam Farmaya:

"Dusro Ki Aurton Se Door Raho, Tumhari Aurtein Bhi Paak DaamanRahegi"
>Mustadrak,Hadi s No.7258
»»
Jab koi Mard Aur Aurat Zina karta he to Emaan unke sine se nikal karsar par saye ki tarah thahar jata he (Mukasheftul kuloob safa: 168)

»»»►Hazrat Ikrema ne Hazrat Abdullah ibne Abbas Radiallahu anu se pucha
Emaan kis tarah nikal jata he? Hazrat Abdullah ibne Abbas ne farmaya is tarah ! Aur apne hath ki ungliyadusre hath ki ungliyo me dali PHir nikal li aur farmaya
"Dekho is tarah" (Bukhari sharif Jild:3, Safa: 614, Hadees: 1713)
»
Hazrat Abuhuraira wa Ibne AbbasRadiallahu anu se Rivayat he Sakar-E-do aalam Sallalahu Alayhi Wasallam ne farmaya "Momin hote hue to koi Zina kar hi nahi sakta" (Bukhari Sharif,Jild:3,S afa:614,Hadees: 1714)
»
Zina ki Saza Aur Azaab: Hazrat Musa Alayhissalam ne Rab ta'ala ki bargahme jub Zina ki sazapuchi to Allah ne farmaya: Use Aag ki Jarrah pahnaunga (Lohe ka libas jo aag se bana hoga) Woh Aisi wazani he ki Agar bahut Bade pahad parrakh di jaye to wobhi reza reza ho jaye (Mukasheftul Kuloob Safa: 168)
»
Allah Ta'ala faramat he
Jo shaks Zina karta he use"Asaam"me dala jayega (Qurane Kareem Para 19, Sure Furkan Aayat 68)
»
Asaam ke bare me Ulma-E-Deen ne kaha he ki woJahannam ka 1 Gar he jab uska Muh khola jayega to uski Badbu se tamam jahannami chikh uthenge (Mukasheftul Kuloob Safa: 167)

7 Aasman aur 7 zamino aur PahadZinakar par lanat bhejte he aur Qayamat ke din Zinakar Mard wa Aurat ki Sharmgah se is kadar badbu aati hogike Jannam me jalane wale ko bhi is badbu se taklif hogi (Bahare Shariat Safa:43)
**
Zina ka Azaab:
Zina: Ek mard Ek aisi Aurat se ya Ek aurat ek aise mard se Sohbat/Humbistari kare jiska uske sath

Nikah hi na hua ho!!!!
Zina karne wale mard ko zani kaha jata hai aur aurat ko Zaniya kaha jata hai.
Aaqa Alayhissalam ne farmaya: Jab koi Mard Aur Aurat Zina karta he to Emaan unke sine se nikal kar sar par saye ki tarah thahar jata he. [Mukasheftul kuloob safa: 168]
.
Zina karne wale shadi shuda ho tokhule Maidanme Pattharo se maardala jaye aur Gair shadi shuda (Kuwara) ho to 100 kode mare jaye. [Bukhari Sharif Jild Safa:615/615, Hadees:1715]

Why is Android built on Linux Kernel?

Android is overwhelming. Its spreading and taking over its competitors.  According to recent reports Android is poised to claim the crown from Apple in the tablet space. For the readers who don’t know, Android is actually Linux-kernel based operating system for mobile devices! That is Android integrates Linux kernel at the bottom of its software stack. In fact Android was created on top of Linux Kernel 2.6. Have you wondered why did Android team choose Linux Kernel? Read on.


Android is open source, therefore any manufacturer can access it, customize it and adapt it according to the requirements of their own gadget. This is the reason why Android is found on variety of gadgets. With camera, without, high-end and low-end, whether a full-fledged tablet or a low-end entertainment device (like Kindle) Android can run on any platform. This has not only given freedom to manufacturers to customize the operating system, add personalized skin, applications or strip-off default Google services (i.e. endless options), adapt the OS to run on high/low spec gadget but it has also given freedom to people—freedom of choice. You are no longer tied to the single company’s ecosystem. You have myriad of devices to choose from. You no longer need a hefty 500 USD you can get a decent Android tablet for just 100 USD. Thanks to open source nature of Android which has made tablet devices so accessible!
Having introduced you to the much popular Android, let me tell you that Android is built on top of Linux kernel 2.6! Kernel? A kernel is the first layer of software that interacts with the device hardware. The kernel is responsible for providing basic architectural model for process scheduling, resource handling, memory management, networking and isolation etc. It must be noted that while Android is built on Linux Kernel, Google has maintained its own forked version of Linux Kernel specifically for android since 2010.
There are number of reasons for selecting Linux kernel. Linux Kernel boasts some proven core features that are integrated in Android operating system. The features of Linux Kernel are:
1- Portability: In our series of blog posts regarding “who runs Linux?” we illustrated the fact that Linux runs on devices of diverse architecture from enormous machines like supercomputers to Large Hadron Collider to smaller devices like motor bikes and tiVo. This is due to the fact that Linux is an immensely portable platform. It is fairly easy to compile Linux on various hardware!
What do you think is the major concern of Android? Well that is that it is picked by many manufacturers and is used on a variety of gadgets. Linux makes that possible. Linux brings Android a level of hardware abstraction. Most parts particularly the low-level ones are written in portable C code that can be accessed and modified by manufacturer easily. This means manufacturers can pick up Android and modify it to adapt it according to their hardware requirements rather that improving the hardware to fit the software!
2- Features: Linux brings to Android some useful features. The Linux Kernel 2.6 includes these features:
Memory Management: While developing for mobile devices memory handling becomes a point of great concern. Thanks to Linux Kernel over which Android is built you can free yourself from the worry. Linux will handle Linux kernel forthreading and lowlevel memory management for Android. Linux kernel is responsible to manage the core feature of any mobile device i.e. memory cache. Linux kernel manages memory by allocating and de-allocating memory for the file system, processes, applications etc.
  1. Process Management: Linux Kernel is responsible to start stop and execute the program. For a beginner a process can be thought of as an instance of computer program. i.e. whenever a program is run on computer the OS creates its instance or process for it which is executed by the OS. In case of Android Linux is responsible to allocate resources to various processes that need them.
  2. Driver Model: As evident this is the layer where all the device specific drivers run. Here Linux ensures that your application is able to run on Android. Manufacturers/ hardware vendors can develop their drivers into Linux in a familiar environment. That is giving plenty room for hardware vendors to optimizing OS. This is one major reason Linux kernel was chosen for Android.
  3. File System Management: Linux also manages the file system which in turn controls the data storage service for android device.
  4. Network Stack: Linux Kernel is responsible to communicate with the network. It also controls networking stack, drivers, routing devices and network adapters.
  5. User account (Security): Linux kernel handles the security between application and the system. Linux takes control of authentication of users and is responsible for user management.Besides this Linux kernel is also responsible for power management and for undertaking various services like internet search, voice communication, system logging etc.
3- Security: Linux runs in scientific research labs, supercomputers and systems for mission critical tasks. Android completely relies on Linux for security. All android applications run as distinct Linux processes under permissions set by Linux system.
Above all, Linux is the poster child of open source and Linux is freely available! Its interesting to note that while Android has gained quiet momentum the former popular PALM smartphone running WebOS were also built on Linux kernel!

How to Share Files Between Linux Systems

In today’s world, most of us have more than one computer device in the house. There is often at least one desktop PC and several laptops connected to the home network. And more recently, tablet computers have been introduced to our networks. Setting up internet access on all these devices is usually a pretty easy and standard task. But when it comes to sharing files between devices, things can become a little more difficult and often require a little more technical knowledge.
It is true that there are cloud options which have flooded the market, such as Dropbox. But cloud options require you to be connected to the internet at all times and use your internet connection bandwidth for file synchronization and transfers. That can often be time consuming when you’re dealing with large media files and directories. And of you’re on a budget internet plan, it could also be costly due to the bandwidth being used for the file transfer(s).
One of the oldest forms of transferring files between computer systems is using the FTP (File Transfer Protocol) method. The method of FTP was originally developed in the early 1970′s. Although today’s revisions are slightly improved from that of the original protocol, the concept is basically the same. And despite its age, FTP has aged gracefully and is still relied upon today from enterprise, universities and many businesses around the world.
For today’s How To, I’ll show you how you can share your own computers files with other computers on your home network and also the internet. So regardless of where you are or what device you’re accessing from, you can have full access to all your own files at all times.
The first thing we’ll need to to is install the required package to get the job done. The package is vsftpd. That’s the actual FTP server daemon required to run for other computers to access the computer running the FTP server. And this can be installed using the following command in a terminal:
sudo apt-get install vsftpd
Once the package is downloaded and installed, we need to make a few simple changes to the vsftpd configuration file which is located at /etc/vsftpd.conf
To make the required changes, the easiest way is via your terminal by using the following command:
sudo nano /etc/vsftpd.conf
The first thing we need to do is secure the FTP server access from any incoming Anonymous connection attempts. Scroll down to the section of the configuration file and ensure the following setting looks like this:
anonymous_enable=NO
And now we need to allow local access for the FTP server. Scroll down to the section of the configuration file and ensure the following setting looks like this:
local_enable=YES
Now just save and exit the nano editor.
Before we actually have access to the FTP server, we must make a few easy changes to the firewall to actually allow for other computers to access the FTP server. If you’re using Ubuntu, then chances are you’re probably using ufw for your system firewall. All you need to do to allow access to the FTP server is type in the following command in to your terminal:
sudo ufw enable
This will ensure the firewall is active and running at system startup. Now type the following:
sudo ufw allow 21
This will open port 21 in the firewall to allow for access to the FTP server. If you do not open this port, other computers will not be able to access your FTP server.
Now that we’ve enabled access via software firewall, we must also enable access via your home network router so that you can access the FTP server over the internet. This will vary depending on your router, so you may have to refer to the router manual to perform these changes.
You need to open port 21 in your router’s firewall and port forward port 21 (FTP) requests to the FTP server’s local IP address. In this instance, the local IP address I am using is 192.168.0.2. But this will vary for every home network.
So now that we’ve installed the FTP server, configured the settings for access and enabled access via both the software and hardware firewall, it’s now time to see whether our FTP server works. If you have followed the above instructions step-by-step, then everything should work correctly. If for some reason you can not connect to the server, the most likely issue will be your firewall settings. Be sure to check over the settings again and ensure you have configured them correctly.
For some simple testing, we need to jump on to a different computer system. For our test, we will boot up Nautilus File Manager as it has built in support for FTP access and other methods of server access. But if you prefer to use a different FTP client, then I’d recommend you give Filezilla a try as it’s an excellent standalone FTP client.
Launch Nautilus and go to File > Connect to Server. And for Service type, change the option to FTP (with login). In the server setting, you’ll need to type the IP address of the computer we just set up the FTP server on. For this test, I used the local IP 192.168.0.2, but use whatever your own system is using. And also remember, if you are accessing your FTP server over the internet, you need to enter the IP address of the internet connection and not the local IP address. Once you’ve typed in the correct IP address for the server, we need to enter Port 21 for access. In the folder setting, just type in home. And upon login to the FTP server, it will take you directly the /home directory of the file system. And the Username setting is pretty obvious, just type your username to login to the FTP server. Once all of the information is entered, just click Connect and Nautilus should now connect to the FTP server. It will prompt you for your password. Once you enter your password, Nautilus will open up the FTP server directory just like any other local directory on the system. And you should now have full access to your server via FTP.
For security reasons, we did not allow write support via FTP for this How To. But you can Copy any file on the system using FTP. Once you have finished copying your files, you should always close the connection. In Nautilus, this is done exactly the same as unmounting any other removable drive/media. On the left-hand side pane, you will see an eject icon, click this and Nautilus will disconnect from the FTP server.
That’s it. You now have a full functioning FTP server running on your network which can be accessed via any other computer on your home network or over the internet.
Generally speaking, FTP is a rather safe method for transferring files between computer systems for general files that home users will be transferring. Some experts warn of the concerns in the way that FTP transmits passwords. Don’t worry, if you are the security conscious type (which is not a bad thing), that’s fine because we also have that base covered with a How To Share Files Between Linux Systems via SSH, using the very secure SSH protocol. You can check out that “How To” next week.

How to install sqldeveloper on Linuxmint 14/Ubuntu12.10

Oracle SQL Developer is an Integrated development environment (IDE) for working with SQL in Oracle databases. Oracle Corporation provides this product free; it uses the Java Development Kit.
Oracle SQL Developer supports Oracle products and a variety of third-party plugins which users may deploy to connect to non-Oracle databases. Oracle SQL Developer works with IBM DB2, Microsoft Access, Microsoft SQL Server, MySQL, Sybase Adaptive Server, and Teradata databases.
Oracle SQL Developer supports automatic tabs, code insight, bracket matching and syntax coloring for PL/SQL.
1- Download  Sqldeveloper   from Oracle  Website
Pirat9@pirat9-VirtualBox ~/Downloads $ ls
 sqldeveloper-3.2.20.09.87-no-jre.zip
 2-  Check  your installed Java version using the command:
pirat9@pirat9-VirtualBox ~/Downloads $ java   -version
Output
java version "1.7.0_07"
 OpenJDK Runtime Environment (IcedTea7 2.3.2) (7u7-2.3.2a-1ubuntu1)
 OpenJDK 64-Bit Server VM (build 23.2-b09, mixed mode)
 pirat9@pirat9-VirtualBox ~/Downloads $
3-  extract  SQldeveloper
Cd the directory where you downloaded sqldeveloper and extract the file:
unzip Sqldeveloper .x.x.zip
cd   sqldeveloper
Now make the script executable:
chmod +x  sqldeveloper.sh
4- Now run the  sqldeveloper  script
./sqldeveloper.sh
Oracle SQL Developer
Copyright (c) 1997, 2011, Oracle and/or its affiliates. All rights reserved.Type the full pathname of a J2SE installation (or Ctrl-C to quit),
the path will be stored in ~/.sqldeveloper/jdk
Please put  your  Java PATH
4- connect  and  enjoy SQL Developer:)

How to use Remote Desktop in Ubuntu

Sometimes, we need to access our computer from other locations when we’re not at home and such. This guide will explain the simplest way of enabling remote desktop connections on a Ubuntu Desktop.
ubuntulogo1

I suppose you have Natty installed, if so, to Start  Remote Desktop, first look for the remote desktop application as described bellow :

Once it opens, you should see an window similar to the one below.

Tick the boxes next to these two options:
- Allow other users to view your desktop
- Allow other users to control your desktop
We need to secure it a bit as well.  So tick the confirmation and password box as well. Specify a password of your choice. It should look somewhat like this:


Now your desktop is shared and anyone with the password and your IP address can can access your desktop remotely.
If you’d like to test if everything is working correctly, open a terminal and enter the following:
vncviewer -fullscreen IP:0
or  via  remote  viewer  Rdesktop
Start  the remote desktop viewer

Ubuntu 12.10 and AMD Catalyst problem (solved)

Many users when they wished to upgrade their Ubuntu 12.04 up to 12.10, they encountered a problem concerning their graphics. This problem appeared only to AMD Radeon GPU users and especially to those who had Radeon HD 4000,  HD 3000 or HD 2000 graphics card.
The root of the problem lies with AMD’s recent announcement which drops the support of these models. As result, after upgrading to Ubuntu 12.10 Quantal, the packaged version of fglrx is no longer functional, leaving the users with a bitter taste of a broken graphics environment.  In a matter of fact, this problem is not 100% percent related to Ubuntu 12.10, but it comes with the new version of xorg 1.13 that is included in Quantal.
According to AMD’s press release:
AMD has moved to the AMD Radeon™ HD 4000, AMD Radeon HD 3000, and AMD Radeon HD 2000 Series new driver support model.  These updates will focus on resolving application specific issues and critical updates. The reason for the shift in support policy is largely due to the fact that the AMD Radeon HD 4000, AMD Radeon HD 3000, and AMD Radeon HD 2000 Series have been optimized to their maximum potential from a performance and feature perspective.
So guys, if you own one of them . . . .
AMD Radeon HD 4000 Series
AMD Radeon HD 3000 Series
AMD Radeon HD 2000 Series
AMD Radeon HD Series AGP
AMD Mobility Radeon HD 4000 Series
AMD Mobility Radeon HD 3000 Series
AMD Mobility Radeon HD 2000 Series
. . . . you are going to use the Legacy driver which currently is Catalyst 12.6 Legacy
Simply put:
-  Ubuntu 12.04 + xorg 1.12 + fglrx = ok
-  Ubuntu 12.10 + xorg 1.13 + fglrx = fail ( even if you try to downgrade xorg down to 1.12 then you gonna break Unity)
solution: Ubuntu 12.10 + xorg 1.13 + legacy_fglrx
That has been told, you can either download the driver from AMD’s Official Website (click here) and then run the script
sh amd-driver-installer-12.6-legacy-x86.x86_64.run
instead of running the script you can build the packages as an alternative:
wget http://www2.ati.com/drivers/legacy/amd-driver-installer-12.6-legacy-x86.x86_64.zip
unzip amd-driver-installer-*
sudo sh ./amd-driver-installer-*.run --buildpkg Ubuntu/quantal
sudo dpkg -i fglrx*.deb
sudo aticonfig --initial -f
or use a 3rd-party repository created by Tomasz Makarewicz for this purpose only. (I personally recommend it)
sudo add-apt-repository ppa:makson96/fglrx
sudo apt-get update
sudo apt-get upgrade
sudo apt-get install fglrx-legacy
finally reboot your PC
However, if something doesn’t work out, you can always remove the repository and go back
sudo apt-get install ppa-purge
sudo ppa-purge ppa:makson96/fglrx

VLC 2.0.4 has been released! PPA Ubuntu 12.10

VLC 2.0.4 has been released, this is a major update that fixes a lot of regressions, bugs and security issues. In this release all playback were improved notably for Blu-Ray, DVD, HLS, Ogg and MKV files; but also for Youtube, Vimeo, Koreus and Soundcloud, adds Opus codec support, including multichannel ones and streams, and MSS playback through DMO libraries, fixes numerous issues and around a hundreds of bugs.
Find more info in the release notes.

Installation

- For Ubuntu and LinuxMint use this stable repository
sudo add-apt-repository ppa:videolan/stable-daily
sudo apt-get update
sudo apt-get install vlc
For other Linux distribution download vlc2.0.4  from this link

Top things to do after installing Ubuntu 12.10 Quantal Quetzal and 12.04

Updated : 16/10/2012: Ubuntu 12.10  Quantal Quetzal final is almost out. The final release it scheduled to be out in the 18th of October 2012. After you actually get done with the installation, there would likely exist a heap of things you still need to take care of. This post will share some interesting insight and ideas about  what you can and should do after a successful installation.
If you have already a previous release of Ubuntu installed and you want to upgrade, then follow our step by step guide to upgrade to Ubuntu 12.10 Quantal Quetzal.
First of things, after any fresh install, and before to start doing anything, check:
a- If sound is working, if not, check our previous post to resolve the issue.
b-If Wifi connexion speed is normal, if it is too slow, check our previous post to resolve the issue.
c-  Install Updates:  Just because you installed the latest version of the operating system doesn’t mean that you have all the upgrades to the softwares that were bundled. Bring up a terminal and run the following to get that fixed.
sudo apt-get update && sudo apt-get upgrade
If you have any other Issue, ask for help in our Question/Answer forum http://ask.unixmen.com
Now lets start.

Must have configuration Tools

1- Ubuntu Tweak

Ubuntu Tweak is a must have application for Ubuntu and LinuxMint, it is an application to config Ubuntu easier for everyone. It provides many useful desktop and system options that the default desktop environment doesn’t provide.
Using Ubuntu Tweak you can install all needed applications with a simple click, you can change the window buttons from Left to right…etc.

Install Ubuntu Tweak via PPA:
Open terminal and enter the following command:
sudo add-apt-repository ppa:tualatrix/ppa  
sudo apt-get update 
sudo apt-get install ubuntu-tweak
Most of the applications listed in this post, can be installed from Ubuntu Tweak Center with one click.
If you want to learn how to use Ubuntu Tweak read our previous post

2- MyUnity

MyUnity is a must have configuration tool for Unity ( change themes, icons, transparency…). More about what Unity can do, can be found on our previous post.
To install MyUnity on Precise Pangolin click this install link

Must have repositories -Medibuntu

3- Add Medibuntu repositories and activate Canonical partner repositories

Medibuntu is a packaging project dedicated to distributing software that cannot be included in Ubuntu for various reasons, related to geographical variations in      legislationMedibuntu regarding intellectual property, security and other issues. by adding Medibuntu repositories you will be able to install many softwares like Google-Earth , opera ,Win32codecs , Msfonts.
Click here and Follow the steps to add Medibuntu repositories to  Ubuntu 12.10 Quantal Quetzal

Don`t like Unity? Install Cinnamon, Gnome3 or switch back to classic Gnome

4- Install Cinnamon

Cinnamon is a Gnome 3 fork that allow you to have a panel at the bottom with a classic Menu, this is useful for people that want to use Ubuntu with a classic Bottom Menu.
sudo add-apt-repository ppa:gwendal-lebihan-dev/cinnamon-stable
sudo apt-get update
sudo apt-get install cinnamon
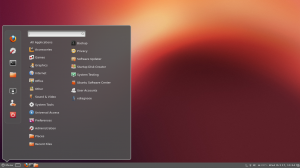
5- Back to Gnome classic:
Install the classic GNOME desktop by installing the gnome-panel package
sudo apt-get install gnome-panel

6- Install Gnome3:

You can install Gnome3 in Ubuntu 12.04 from repository by using this simple command:
sudo apt-get install gnome-shell

7- Move Unity to the bottom

This option is not available  yet for Precise Pangolin, i will inform you when the PPA is updated to ubuntu12.04 LTS. For Ubuntu11.10 check our previous post

Sys Monitoring & EyeCandy

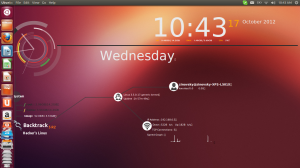
8- Install Conky for Quantal Quetzal

Conky is a free, light-weight system monitor for X, that displays any information on your desktop. There are many nice themes available for conky that can display clock, CPU usage, ram usage, swap, disk, net and more. Check our previous post for installation and configuration of Conky in Ubuntu 12.04 and 12.10 Quantal Quetzal.

9- Change icons? Try these ones :

Wanna change the default icons to something that match your taste? Check this nice collection of icons for Ubuntu (PPA included)

Multimedia ( Don`t install everything, install just what you need)

10- VLC  Media player:

Unless you can use mplayer perfectly yourself, I recommend installing the vlc media player.
VLC is the best media player for Linux it play almost everything , he has many features that you can not find in any other media player , read this post if you want to know  what vlc media player can do:  25 things you can do with VLC Media player!
You can install VLC from Ubuntu software center or via terminal by using the following command:
sudo apt-get install vlc
Or click to install vlc

11- Media centers:  XMBC

XBMC is an award-winning free and open source (GPL) software media player and entertainment hub for digital media. XBMC is available for Linux, OSX, Windows, and the original Xbox. While XBMC functions very well as a standard media player application for your computer, it has been designed to be the perfect companion for your HTPC. Supporting an almost endless range of remote controls, and combined with its beautiful interface and powerful skinning engine, XBMC feels very natural to use from the couch and is the ideal solution for your home theater.
Open terminal and copy the following commands:
sudo add-apt-repository ppa:team-xbmc sudo apt-get update sudo apt-get install xbmc

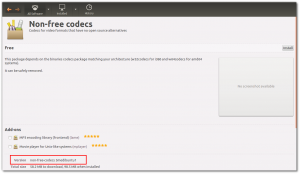
12- Install common codecs

Perhaps installing a few common codecs might give you better sensibility of your system.
sudo apt-get install non-free-codecs libxine1-ffmpeg gxine mencoder totem-mozilla icedax tagtool easytag id3tool lame nautilus-script-audio-convert libmad0 mpg321 mpg123libjpeg-progs

13- To play encrypted DVDs, the libdvdcss2

To play encrypted DVDs, the libdvdcss2 package is essential. libdvdcss is a simple library designed for accessing DVDs like a block device without having to bother about the decryption.
If you already added Medibuntu repositories above, you can Install from software center or using the terminal by entering the following command:
sudo apt-get install libdvdcss2 && sudo /usr/share/doc/libdvdread4/./install-css.sh

14-Enabling Flash support on your browsers:

- For Ubuntu 32 bit & 64 bit : To be able to watch some videos and see flash website in your browser (firefox/ Chrome..), you need to install flash plugin, go to  ubuntu software center and search  word “flash” and install it.

Video Editors

15- Openshot video editor

My  favorite Video editor is Openshot,  the best existing actually for Linux.  You can install Openshot from Ubuntu software center, but if you want to install the latest release, you can do that by adding the following repositories:

sudo add-apt-repository ppa:jonoomph/openshot-edge sudo apt-get update sudo apt-get install openshot openshot-doc
Read also our interview with Jonathan Thomas the main developer of Openshot.

Torrents client

16- Deluge- The best torrent client

The Deluge application was designed to be a full-featured BitTorrent client. Deluge uses libtorrent in it’s backend and PyGTK for it’s user interface,  and is  currently usable on POSIX-compliant operating systems. It is intended to bring a native, full-featured client to GTK desktop environments such as GNOME and Xfce. An official Windows port is also available.
Open terminal and type the follwing commands:
sudo add-apt-repository ppa:deluge-team/ppa
sudo apt-get update
sudo apt-get install deluge


Messenger

17- Pidgin : The best messenger client and 30 plugins, you can enjoy chat with freinds using voice and cam.
18aMSN is a free windows Live Messenger clone. aMSN attempts to emulate the look and feel of Windows Live Messenger, and supports many of its features.
aMSN has features not present in Windows Live Messenger. Users can set alarms, are able to see others who have removed them from their contact list, and are able to open many profiles at once. It is also very customizable, with extensions and themes available at the main site.

19-Skype:

If you’re want to install Skype, check our previous post: Howto- Install Skype in Ubuntu 12.04 Precise Pangolin


Gaming & Emulators

20- Gaming made easy with playdeb (PPA)

If you are a fun of gaming so is important to add Playdeb repositories to your Lucid Lynx. Playdeb is a gaming repository for Ubuntu – aimed to provide titles already available on getdeb.net in an easier to install and update format. You can install many games by a simple click.

21- Wine

Wine enables Linux, Mac, FreeBSD, and Solaris users to run Windows applications without a copy of Microsoft Windows. Wine is free software under constant development. Other platforms may benefit as well.”
Please follow instructions in our previous post : how to install and configure games on wine


 Sharing folders in  Precise Pangolin

22- Smba share

In order to share folders in Precise Pangolin with other Linux and windows machines in your network, you will need to install and configure samba share, for instructions how to configure samba in Ubuntu check our previous post : Install and Configure Samba share in Ubuntu 12.04 Precise Pangolin | Howto

Extra application

23- Installing Archive Management Apps:

 If you’re a frequent media downloader from the internet, you know how various forms archives can have. Installing the following will allow you to deal with most of these.
sudo apt-get install unace unrar zip unzip p7zip-full p7zip-rar sharutils rar uudeview mpack lha arj cabextract file-roller

24-Y PPA Manager:

Y PPA Manager is a GUI tool to easily add PPAs, search a package in all Launchpad PPAs, remove duplicate PPAs (only works with separate .list files), backup PPAs and other PPA-related tasks. Check out the Launchpad page for a complete features list.
sudo add-apt-repository ppa:webupd8team/y-ppa-manager sudo apt-get update sudo apt-get install y-ppa-manager

25- Install Java7

First you need to remove openjdk for this run the following command from your terminal
sudo apt-get purge openjdk*
Now you can install Java7 by adding the following repository:
sudo add-apt-repository ppa:webupd8team/java
sudo apt-get update
sudo apt-get install oracle-java7-installer
To remove Oracle Java 7, run this in terminal:
 sudo apt-get remove oracle-java7-installer

26- Filezilla the best ftp client for linux

Filezilla is the best ftp client for Linux
Install via command line :
sudo apt-get install filezilla

27- DropBox:

Dropbox is a free service that lets you bring all your photos, docs, and videos anywhere. This means that any file you save to your Dropbox will automatically save to all your computers, phones and even the Dropbox website. Dropbox also makes it super easy to share with others, whether you’re a student or professional, parent or grandparent.
Download the Dropbox package:

28 – VirtualBox:

If you want to run another OS in a virtual Machine, the best is to install Virtualbox.
For installation, follow the instructions in my previous post.

29- Cheese for your cam?

Cheese uses your webcam to take photos and videos, applies fancy special effects and lets you share the fun with others.

30- Gimp:

Regardless of whether you need to edit images daily on a professional level or just a hobbyist, GIMP is an essential tool for all.

sudo add-apt-repository ppa:matthaeus123/mrw-gimp-svn 
sudo apt-get update 
sudo apt-get install gimp gimp-data gimp-plugin-registry gimp-data-extras

31- Install Compiz

To install compiz use the following command:
sudo apt-get install compiz compizconfig-settings-manager compiz-plugins
For configuration, please check our previous post.
Other useful Internet applications:
  • Opera : The fastest browser on Earth is even faster. But that is not all. Use Opera Turbo to double your page-download speed on slow connections.
  • Google Earth- Travel to cities across the globe, dive into the depths of the ocean, explore remote islands, and even fly to faraway galaxies

Install and Configure Samba share in Ubuntu 12.04, 12.10 Quantal Quetzal| Howto

One of the most asked features for Samba is a graphical user interface to help with configuration and management,  there are several GUI interfaces to Samba available, for me the most  simple and powerful one of these tools is samba server configuration tool. In this post, i will show you how to install and configure samba in Ubuntu 12.10 Quantal Quetzal, this work also for previous releases of Ubuntu.

Check also our previous post on installation and configuration of samba via command line.

Installing Samba on Ubuntu:

1- Install Samba files
First thing we need to do is to install samba, go to Software center in Ubuntu and search for samba then install the package. If you want to install it via terminal then copy this command :
sudo apt-get  install  samba samba-common
2- Install some dependencies for Configuration tools (don`t   forget to  install python-glade2)
sudo apt-get install python-glade2
3- Installing Samba Server configuration Tool :
Now install the graphical interface System-config samba
sudo apt-get install system-config-samba
4- Add a Linux/Unix user:
adduser   pirat9
5- Make  a Linux/Unix  password for  user  pirat9
passwd pirat9
6- Now open samba configuration tool.

7- Add the  folder you want to share and setup the permissions access.

- Setup the permissions access

8- Now before to connect to  the  share, you  have  to  create the  samba user  :
sudo smbpasswd -a  pirat9
New SMB password
retype New SMB Password
Now the configuration is done.
Tip: You can chose any  directory you want to share by  right click on the  folder directory and open the  share options
And activate share:


9- Now, let`s test if samba share is working from another Linux Machine, in my case will try to connect from LinuxMint12 machine to Ubuntu 12.04 machine where we just installed samba, from menu open connect to server and type the details of your Ubuntu machine


12- Connect  from  windows  (XP/Vista/7)


Enjoy
For questions please refer to our Q/A forum at : http://ask.unixmen.com

Install LDAP Server in Centos Step by Step

OpenLDAP Software is a free, open source implementation of the Lightweight Directory Access Protocol (LDAP) developed by the OpenLDAP Project. It is released under its own BSD-style license called the OpenLDAP Public License. LDAP is a platform-independent protocol. Several common Linux distributions include OpenLDAP Software for LDAP support. The software also runs on BSD-variants, as well as AIX, Android, HP-UX, Mac OS X, Solaris, Microsoft Windows (NT and derivatives, e.g. 2000, XP, Vista, Windows 7, etc.), and z/OS.

1- Installl  LDAP

yum install  openldap*

2- Make  LDAP  admin password  with

 slappasswd -s passd -h {MD5}
{MD5}1/aVR9h11ZhMfA0YX2KoGw==
Remember this  password.

3- Edit  slapd.conf this file  and  edit the  suffux and  admin suffix

vi /etc/openldap/slapd.conf
# line 86 and 87: specify suffix
suffix          “dc=unixmen-test,dc=com”
rootdn          “cn=Manager,dc=unixmen-test,dc=com”
make  a  root password on line 92 with password  geneated  with  the first  command
rootpw         {MD5}1/aVR9h11ZhMfA0YX2KoGw==
# add at the bottom access to attrs=userPassword
by self write
by dn=”cn=Manager,dc=unixmen-test,dc=info” write
by anonymous auth
by * none
access to *
by dn=”cn=Manager,dc=unixmen-test,dc=info” write
by self write
by * read

4- Configure the  ldap config and  change  my-domine to  yours

vi  /etc/openldap/ldap.conf
BASE    dc=unixmen-test, dc=com
chamhe  the  config  in /etc/ldap.config
# The distinguished name of the search base.
base dc=unixmen-test,dc=com

5- Copy the example  config   to /var/lib/ldap/DB_CONFIG  like

cp  /etc/openldap/DB_CONFIG.example   /var/lib/ldap/DB_CONFIG

6- Start  Ldap  Server

 /etc/init.d/ldap start

For questions please refer to our Q/A forum at : http://ask.unixmen.com